

Achieving Metrological Excellence: A Comprehensive Guide to the Probe Calibration Procedure
In the high-precision world of modern manufacturing, the difference between a successful production run and a costly batch of scrap is often measured in microns. As industries such as aerospace, automotive, and medical device manufacturing push the boundaries of complexity, the reliance on Coordinate Measuring Machines (CMMs) and machine tool probing systems has become absolute. These systems are the gatekeepers of quality, ensuring that every component meets rigorous design specifications. However, the accuracy of these measurements is entirely dependent on the integrity of the measurement interface: the probe. To maintain this integrity, engineers must adhere to a strict and scientifically grounded probe calibration procedure. This process is not merely a routine maintenance task; it is the fundamental act of establishing a mathematical relationship between the physical stylus and the machine’s coordinate system. Understanding the nuances of this procedure is essential for any metrologist or CNC operator who demands absolute confidence in their data.
The Physical and Mathematical Foundations of Probing
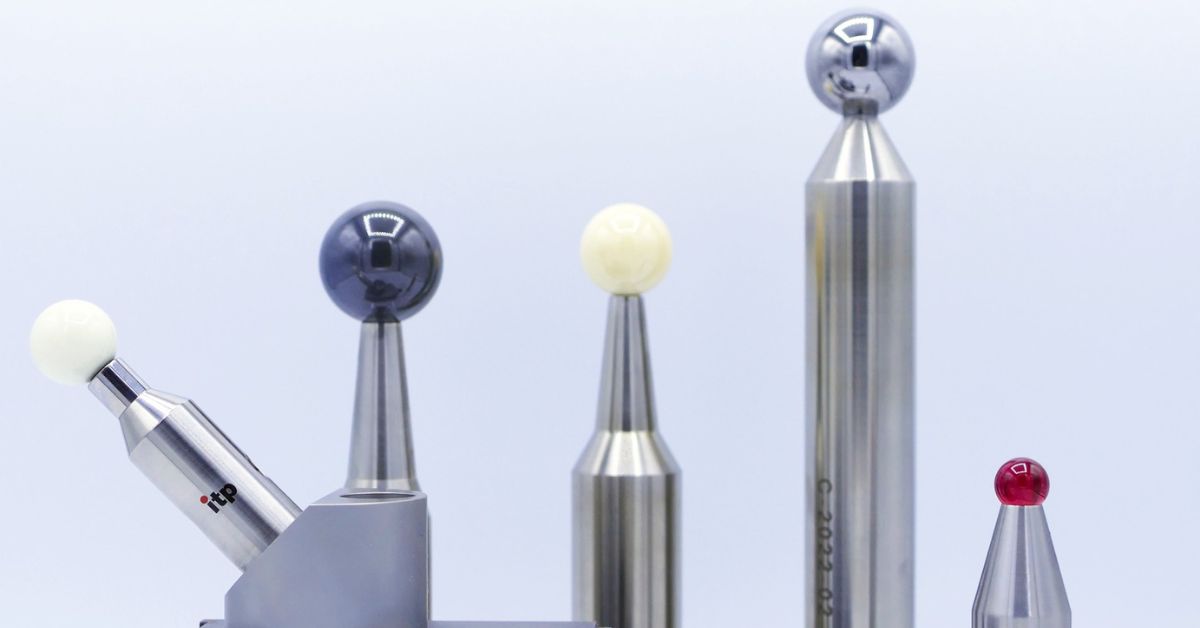
Before diving into the procedural steps, it is vital to understand what occurs during the calibration of a probe. A common misconception is that the machine inherently “knows” exactly where the center of the stylus ball is located in 3D space. In reality, when a probe is mounted, the machine only knows the position of the probe head or the spindle. The physical stylus attached to that head has its own length, orientation, and ball diameter, all of which are subject to manufacturing tolerances and mounting variations.
The calibration process, often referred to as “qualifying” or “mapping,” uses a calibration sphere of a known, certified diameter. When the probe touches this sphere from multiple directions, the software records the machine coordinates at each touch point. By comparing these points to the known geometry of the sphere, the system calculates two critical values: the effective stylus ball radius and the 3D offset of the ball center relative to the probe head. This mathematical map allows the software to compensate for the “pre-travel” of the probe—the microscopic distance the stylus moves before the trigger signal is sent—ensuring that the final measurement reflects the true surface of the part rather than the center of the ball.
Environmental Stability and Pre-Calibration Requirements
The success of a probe calibration procedure begins long before the first touch. Because metrology is the study of measurement in a physical world, it is subject to the laws of thermodynamics. Thermal expansion is the silent enemy of accuracy. Even a minor fluctuation in ambient temperature can cause the machine structure or the stylus shank to expand or contract, invalidating the calibration. Therefore, the calibration must be performed in a temperature-controlled environment, and the machine should be allowed a sufficient “soak time” to reach thermal equilibrium.
Beyond temperature, physical cleanliness is paramount. A single speck of dust or a film of oil on the calibration sphere or the stylus tip can introduce an error of several microns. This error is particularly insidious because it is “baked into” every subsequent measurement taken with that probe. Professional protocols require the use of lint-free wipes and specialized cleaning agents to ensure that the contact surfaces are pristine. Furthermore, the stylus must be inspected for any signs of wear or damage, such as “flats” on the ruby ball or micro-cracks in the ceramic or carbon fiber stem, which would compromise the repeatability of the results.
Step by Step Execution of the Calibration Cycle
Once the environment and hardware are prepared, the formal calibration cycle begins. The process typically starts with the definition of the calibration sphere within the metrology software. This includes inputting the certified diameter and the approximate location of the sphere on the machine bed. The probe is then moved to a “safe” position above the sphere to begin the automated routine.
The initial phase is the “rough” find, where the probe takes a small number of hits to establish the sphere’s general position. This is followed by the high-precision qualification phase. During this stage, the probe takes a series of hits—usually between 5 and 25 depending on the required accuracy—across the hemisphere of the calibration ball. These hits are strategically distributed to capture the probe’s performance across different vectors. The software then uses a least-squares fit or a similar mathematical algorithm to calculate the sphere’s center and the effective radius of the stylus. If the probe is a multi-axis or articulating head, this process must be repeated for every angle and orientation that will be used during the actual measurement of the part.
Analyzing Results and Identifying Metrological Errors
The completion of the physical hits is only half of the procedure; the analysis of the resulting data is where true metrological skill is demonstrated. The software will provide a “Standard Deviation” or “Sigma” value for the calibration. This value represents the repeatability of the hits on the sphere. A high standard deviation is a clear red flag, indicating that something is wrong with the setup. This could be due to a loose stylus, a vibrating machine tool, or a contaminated sphere.
Another critical value to monitor is the “Calculated Diameter” versus the “Nominal Diameter.” It is normal for the calculated diameter to be slightly smaller than the physical diameter of the ruby ball because of the pre-travel compensation mentioned earlier. However, if this difference deviates significantly from the probe manufacturer’s specifications, it suggests a loss of spring tension in the probe body or excessive friction in the triggering mechanism. A diligent operator must review these metrics after every calibration to ensure the system is operating within its “metrological envelope” before proceeding to inspect expensive flight-critical or life-saving components.
Frequency of Calibration and Operational Triggers
A common question in the machine shop is how often the calibration should be performed. While some organizations follow a strictly time-based schedule—such as every shift or every 24 hours—the most effective approach is event-based. A probe should be recalibrated immediately if it has been subjected to a “crash” or even a light collision. Even if the stylus appears straight, the internal mechanism may have been displaced.
Calibration is also required whenever a stylus is changed or the probe head is adjusted. In high-precision CNC machining, even the heat generated by the spindle during a long operation can cause enough thermal drift to necessitate a mid-process “re-qualification.” By integrating automated calibration cycles into the CNC program, manufacturers can maintain a “closed-loop” quality process that adjusts for environmental changes in real-time. This proactive approach minimizes the risk of producing out-of-tolerance parts and provides a robust data trail for quality audits and regulatory compliance.
The Strategic Value of Calibration in Industry 4.0
As we move into the era of Industry 4.0 and the “Smart Factory,” the role of probe calibration has evolved from a back-office necessity to a front-line strategic advantage. In an automated environment, the probe is the “eyes” of the machine. Accurate calibration allows for automated part alignment, in-process tool wear compensation, and even “adaptive machining,” where the toolpath is modified based on the actual geometry of the workpiece.
Without a rigorous and verified calibration procedure, these advanced technologies are built on a foundation of sand. The data fed into the digital twin or the AI-driven analytics engine is only as good as the sensor that collected it. By prioritizing the precision of the probe interface, manufacturers can achieve higher yields, lower costs, and a level of repeatability that was previously unattainable. In the end, calibration is not just about measuring a part; it is about establishing the trust and certainty that allow modern industry to innovate with confidence. Metrology is the language of trade, and a perfectly calibrated probe ensures that the message is always clear and accurate.